
Glazing putty is a finishing putty used for pinholes and other minor surface imperfections.
Most modern glazing putties, or glazes, are two-part, polyester systems intended to be mixed with a hardener. Once mixed, the consistency should be flowable with a decent vertical hang (a.k.a. non-sagging formula). They can be called by a number of names – finishing glaze, finishing putty, glaze, glazing putty – among others.
When Should Glazing Putty Be Used?
No matter how good your body work is and how much product technology has improved, you will most likely run into minor surface imperfections at some point. The most common are pinholes, sanding scratches, and low spots.
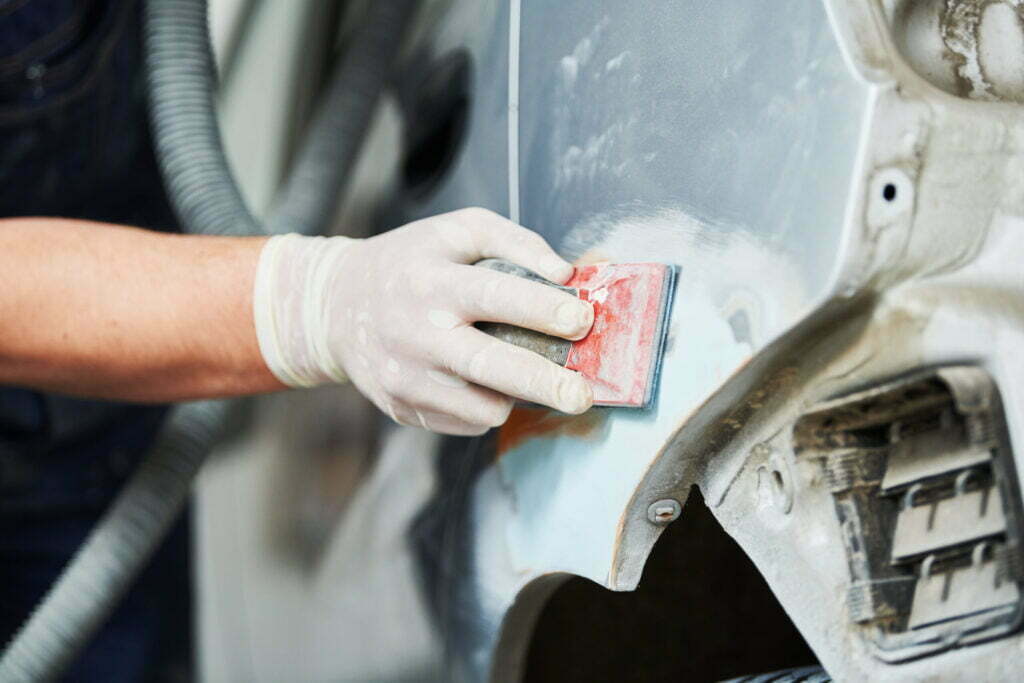
Pinholes – For pinholes, use a plastic razor blade and apply pressure evenly spreading the glaze across the surface to force it into pinholes.
Sand scratches – The same technique can also be used for sanding scratches, and in the case that you run into sanding scratches in your primer glazing putty can easily fill those scratches. Just be sure to spot prime before you paint.
Low spots – run the palm of your hand over your sanded body filler to identify any low spots you may have. When you are using a glazing putty to fill the low spots you will not need to apply as much pressure, unless of course the low spots also contain pinholes or scratches. In that case, first make a pass applying pressure and then use some of the excess glaze to go back and fill in the low spots.
What about skim coating?
Yes, glazing putty can and should also be used in skim coating applications and very minor rock chips or dents. When skim coating, glazing putty may need to be mixed proportianately with your filler as long as the application will result in a very low-build. This should be your final step before priming.
Do I need to sand glazing putty before priming?
Once the you have completed any or all of the above steps to ensure your surface is smooth and free of imperfections, sand and even out your glaze. In this step you will sand down any high spots and feather the edges of the glaze into the current paint. Follow manufacturer recommendations for what grit levels of sandpaper to use or whatever standard operating procedures your shop has implemented.
How do I find a good glazing putty to use?
There are certainly a wide variety of brands to choose from. One of the top coating brands in the autobody and collision repair industry, Evercoat, has produced a glaze for its Z-GRIP line.
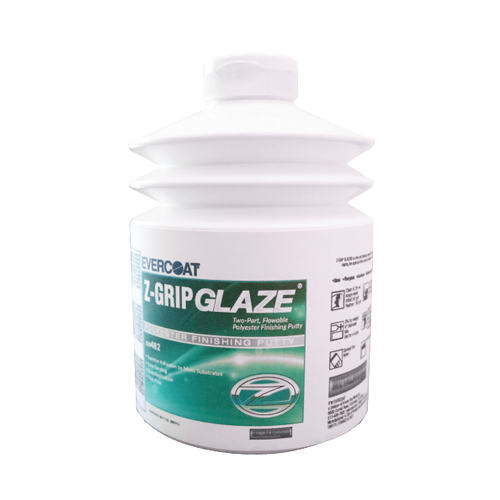
How to Use Evercoat 100482 Z-GRIP GLAZE®
Z-GRIP GLAZE® is a two-part, flowable, polyester finishing putty ideally suited for filling and skim coating body work, pinholes, grind marks, low spots and other surface imperfections. Can also be used to fill minor body damage up to 1/8” (3 mm) in depth.
Suitable Substrates
- Sanded Body Filler
- Steel
- Fiberglass
- Aluminum
- Galvanized Steel
- Most Rigid to Semi-Rigid Plastics
- Sanded OEM Paint
Preparation
Clean and degrease the entire panel to be repaired with soap and water, followed by a mild cleaning solvent. Thoroughly dry the surface before repairing. Use 80-180 grit to remove or scuff the paint and featheredge.
Mixing
Place the desired amount of material on a clean, non-fibrous surface. Knead the cream hardener before use. Measure hardener 2% by weight (add a ribbon of cream hardener from edge to edge across the center of a 4” (10 cm) diameter puddle. Puddles larger than 4” in diameter will require additional hardener. Mix thoroughly until uniform color is achieved. Approximate setting time is 4 – 5 minutes @ a temperature of 72°F (22°C)
Application
Spread a thin layer of mixed material over surface using firm pressure. Apply additional layers to build material slightly higher than the surface to allow for sanding to desired contour.
NOTE: Do not apply over new or uncured coatings. Avoid thick heavy applications.
Finish
Sand to contour with 180 grit sandpaper. Final sand with 180 grit followed by 220-320 grit if desired.
Topcoat
Apply 2K polyester, 2K urethane, 2K epoxy, or 1K primer to manufacturer’s recommendations
Z-GRIP GLAZE® comes packaged with a blue cream hardener. For use with Evercoat cream hardener only. For additional technical product information see the Evercoat TDS.
Contact your local jobber for pricing and availability